Creating Shapefiles - Drawing lines, points or polygons (vectors) in ArcGIS
- Input options: Any georeferenced image file (view list) or WMS layer (view list) containing features you would like to trace.
- Output options: A shapefile or KML file with vector features.
- Strengths: Offers a wide range of input and output image formats. Has an extensive choice of coordinate systems and transformation methods to work in.
- Weaknesses: Uses proprietary software which must be purchased and can take time to learn.
Workflow:
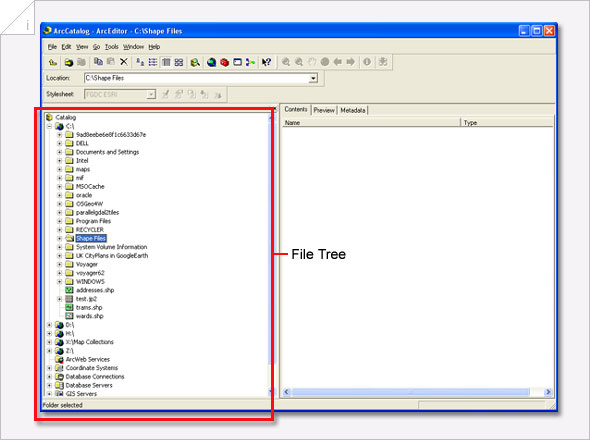
Creating and Setting up a Shapefile in ArcCatalogue.- Open the ArcGIS - ArcCatalogue software
- Use the File Tree on the left hand side to browse to the location you would like to create and save your Shape File.
- From the Arc Catalogue menu bar select File and New > Shape File
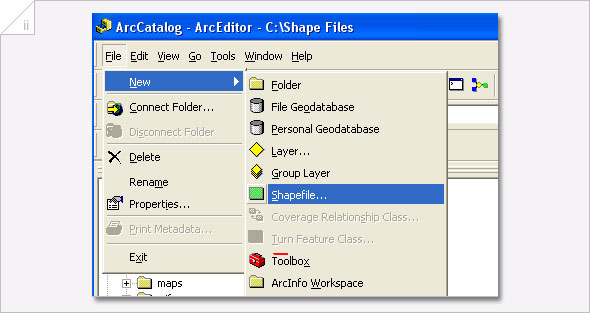
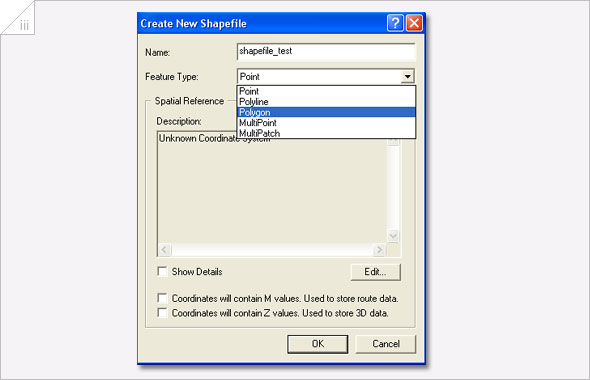
- The Create New Shapefile window will open.
This is used to set the preferences for the Shapefile you are creating. - In the Name field enter a name for the Shapefile you are creating.
- For Feature Type, select the type of vector feature you would like to create.
- It is also possible to set up your shape file in a specific coordinate system.
If you prefer, you can choose to leave this empty and specify it later.
 To set the coordinate system click the Edit button.
The Spatial Reference Properties window will open.

 In the Spatial Reference Properties window, click the Select button.
You can then browse through sets of predefined coordinate systems and choose the one you require.
The best one to choose if using our georeferenced maps or WMS layers is the British National Grid, OSGB 1936 (EPSG:27700).
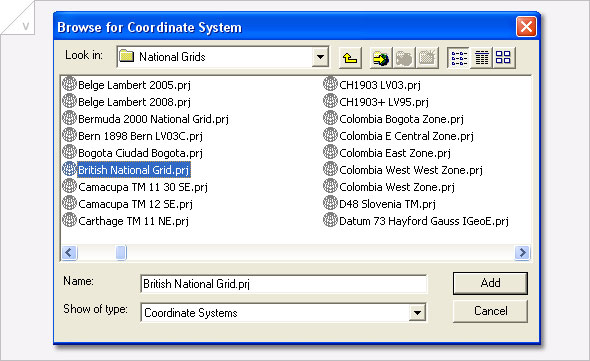
 Click Add to add the coordinate system to your Shapefile.
 Once added, click OK on the Spatial Reference Properties window.
To finish creating your Shapefile click OK on the Create New Shapefile window.
Your Shapefile should now appear as a file in the ArcCatalogue window.
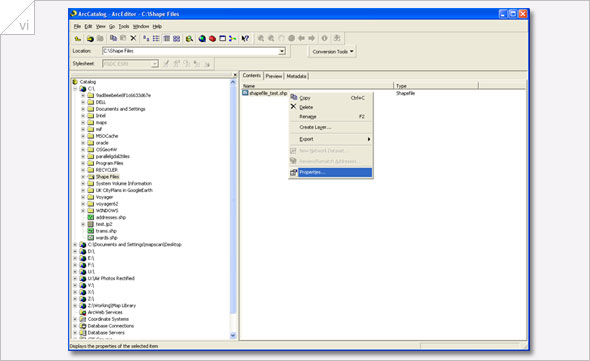
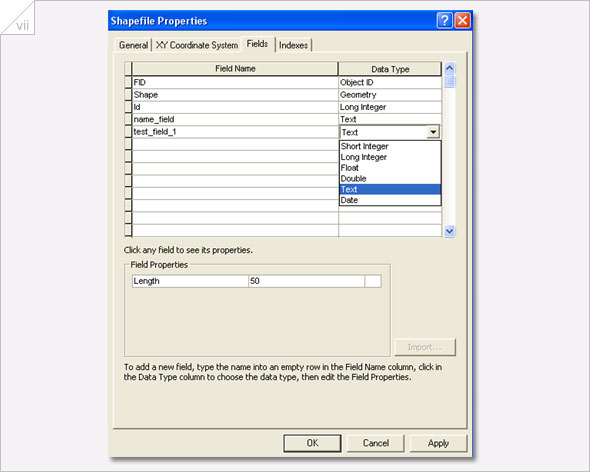
- You now need to set up the database associated to the Shapefile.
This database is used to store data against each vector shape we create in our Shapefile.
Right click the Shapefile in the Arc Catalogue window and select Properties.
The Shapefile Properties window will open.
Type in the Field Name column to add further fields for information you want to contain in the Shapefile's database. When you add a field, choose what type of data it will contain by selecting a format from the Data Type column.
You add information to the Shapefile's database using the Shapefile's Attributes Table in ArcMap.
You will learn how to do this in the follwing steps describing how to create and edit Shapefile features in ArcMap.
Note: Selecting Feature Type
The most common types to choose are either point or polygon. Point allows vector points to be placed on a map to mark single locations. Polygon is used to draw vector areas on a map. Polygon is often used to trace features on a map or mark boundaries.
- Open the ArcMap GIS software
-
 Use the 'Add Data' button to add any georeferenced base maps or layers that you want to use as a reference for creating your Shapefile.
Click this link to view a list of available georeferenced maps and layers.
Use the 'Add Data' button to add the Shapefile you created in ArcCatalogue.
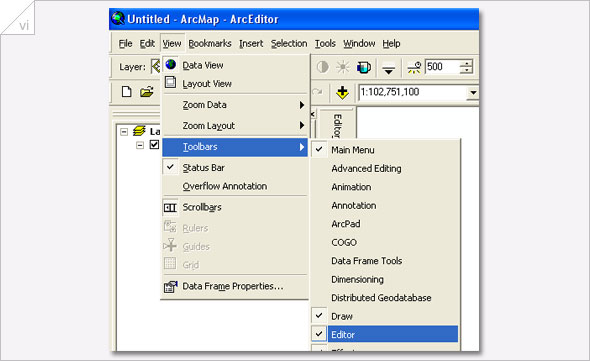
Your Shapefile and maps you've added will appear as layers in the Table of Contents on the left hand side and will be displayed in the workspace. (At this point you will not have added any information to your shapefile, so nothing will appear in the workspace showing your shapefile.) - Open the Shapefile Editor toolbar.
On the menubar select View > Toolbars > Editor.
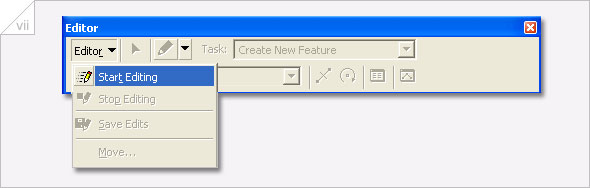
- To start editing your Shapefile click the
 button on the Editor toolbar and select Start Editing from the menu.
The Editing tools will now be visible on the Editor Toolbar.
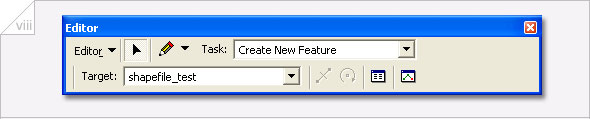
- In the Task box make sure Create New Feature is selected.
In the Target Dataset box always ensure the Shapefile you would like to edit is selected.
This is important when working with multiple Shapefiles in a single project. - How you draw your Shapefile will depend on which Feature Type (point, polygon, polyline etc.) you selected when setting it up your Shapefile in ArcCatalogue.
The steps below describe drawing polygon features, but the workflow is very similar for other types.
Detailed guides for drawing all Feature Types, and using more advanced editing tools, can be found on the ESRI ArcGIS website help pages - On the Editor Toolbar click the ****** button.
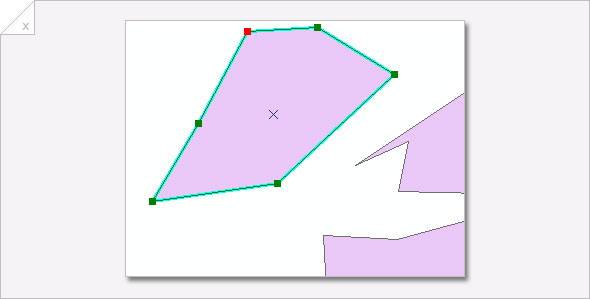
Now in the ArcMap workspace click to set each vertex of the polygon you want to draw.
 Remember to also use the Zoom and Pan tools to navigate within the workspace to help you mark points and trace features of the georeferenced base map you are referencing.

To finish drawing your polygon, double click when setting the final vertex of your polygon.
It should appear similar to the image below...

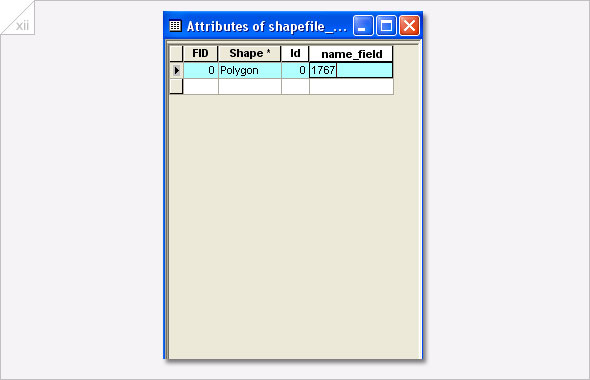
- You can now name your feature in the Shapefile's Attributes Table
If you chose to set up other fields when creating your Shapefile in ArcCatalogue you can also enter this information.
To open the Attributes Table, right click the Shapefile layer in the Table of Contents and Select Open Attributes Table
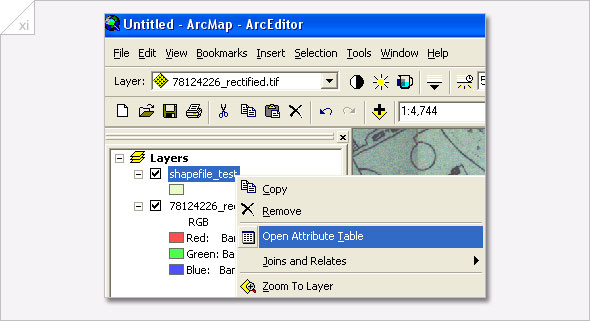
- This will open the Attributes Table.
Each feature you draw will have it's own entry in the table.
Enter a name for the Polygon Feature you have created in the 'name_field' we set up in ArcCatalogue.
- You must save the features and edits you have made to your Shapefile.
To do so click the button on the Editor Toolbar and select Save Edits.
If you want to add further features, repeat steps 6 to 10 that you have just followed.
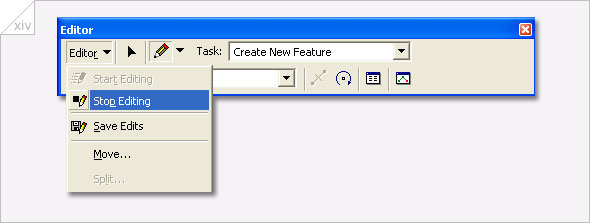
When you are finished adding and editing your Shapefile you need to Stop Editing.
To do so click the button on the Editor Toolbar and select Stop Editing. - You may of course want to edit or delete the vector features you add to your shapefile.
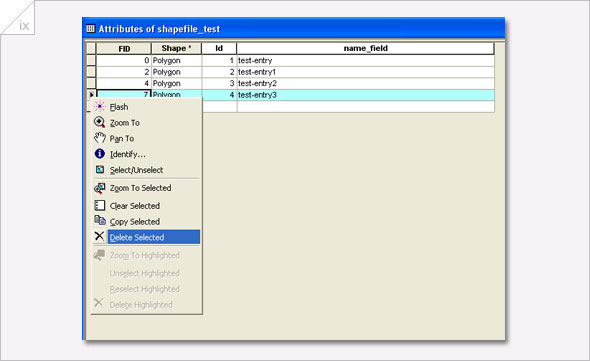
An easy way to delete a feature you have added is to select its corresponding entry in the Shapefile Attributes Table.- Click to the left of an entry in the Attributes table so that it is highlighted in blue.
- Now right click and select Delete. The entry and it's corresponding vector feature will be deleted.
If you just want to edit the drawing of a feature you created this is also possible.- Make sure you are in editing mode by selecting Start Editing from the Editor toolbar.
 Now select the Edit Tool from the Editor toolbar.
- Double click inside the feature you want to edit so that it is highlighted in blue with its vertices visible.
- Now hover over the vertex you would like to edit.
You will see the mouse pointer icon change to the edit vertex icon
- Click and drag the point to where you would like it to be positioned.
Repeat as necessary to alter any other vertices positions. - Remember to select Save Edits from the Editor toolbar to finish.
- Click to the left of an entry in the Attributes table so that it is highlighted in blue.